

Can Identityconfig.cs Be Updated Without Push
This browser is no longer supported.
Upgrade to Microsoft Edge to take advantage of the latest features, security updates, and technical support.
Account confirmation and password recovery with ASP.Net Identity (C#)
Before doing this tutorial you lot should first complete Create a secure ASP.Net MVC 5 spider web app with log in, email confirmation and password reset. This tutorial contains more details and will bear witness you how to gear up e-mail for local account confirmation and let users to reset their forgotten password in ASP.Cyberspace Identity.
A local user account requires the user to create a password for the account, and that countersign is stored (deeply) in the spider web app. ASP.Net Identity also supports social accounts, which don't require the user to create a password for the app. Social accounts use a third party (such every bit Google, Twitter, Facebook, or Microsoft) to authenticate users. This topic covers the following:
- Create an ASP.Internet MVC app and explore ASP.NET Identity features.
- Build the Identity sample
- Fix email confirmation
New users register their electronic mail allonym, which creates a local account.
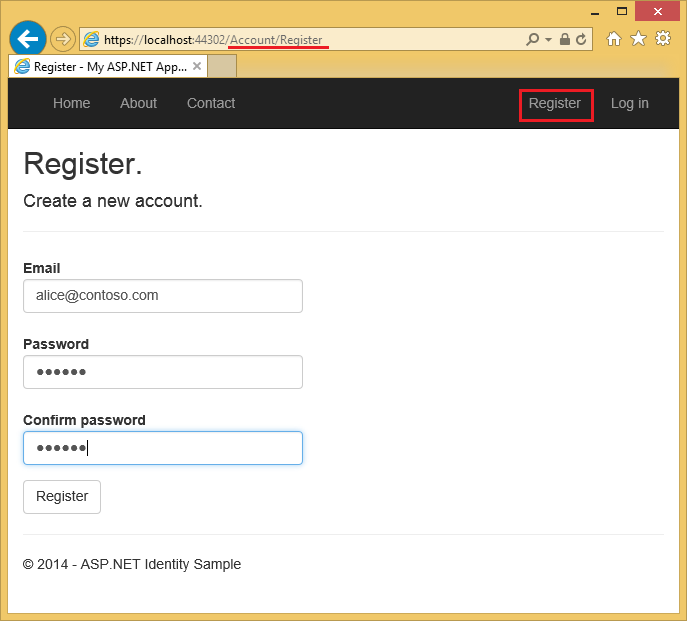
Selecting the Register button sends a confirmation email containing a validation token to their email address.
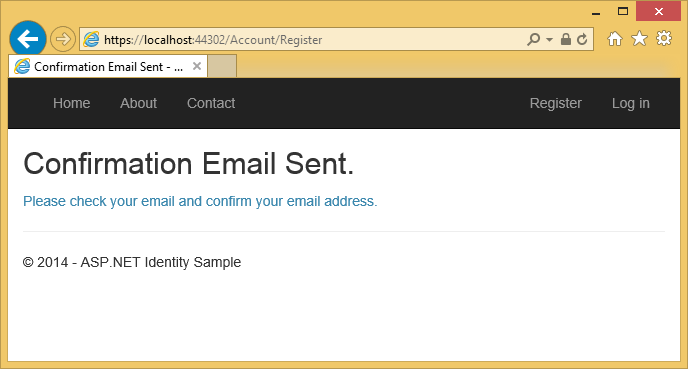
The user is sent an email with a confirmation token for their account.
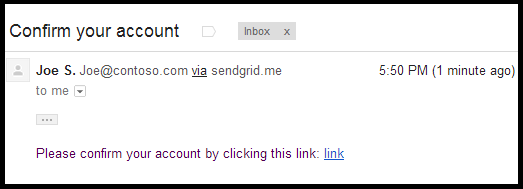
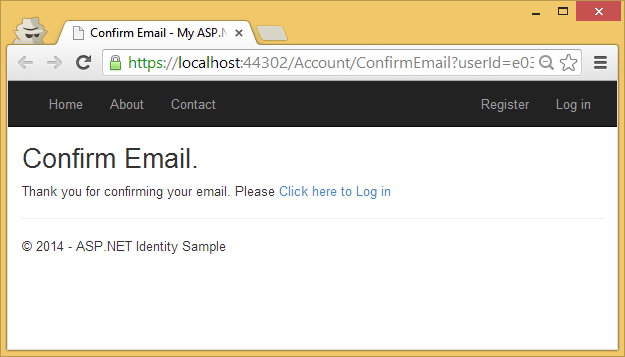
Selecting the link confirms the business relationship.
Password recovery/reset
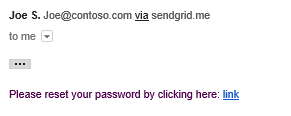
Local users who forget their password tin can take a security token sent to their email account, enabling them to reset their password.

The user volition presently get an email with a link allowing them to reset their password.
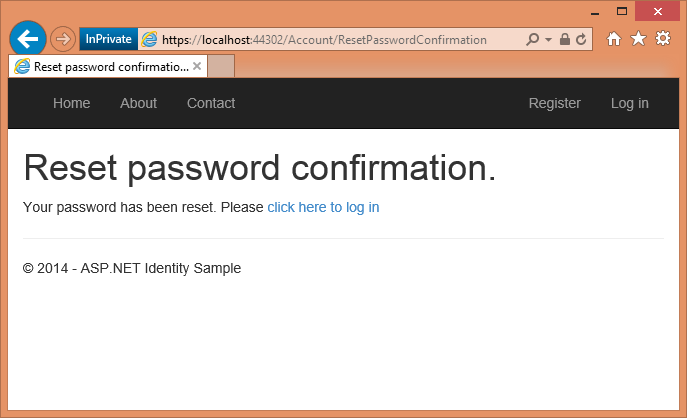
Selecting the link will take them to the Reset page.

Selecting the Reset button will confirm the password has been reset.
Create an ASP.NET web app
Outset by installing and running Visual Studio 2017.
-
Create a new ASP.Internet Spider web project and select the MVC template. Web Forms likewise support ASP.NET Identity, then you could follow like steps in a spider web forms app.
-
Alter the authentication to Private User Accounts.
-
Run the app, select the Register link and annals a user. At this point, the just validation on the electronic mail is with the [EmailAddress] attribute.
-
In Server Explorer, navigate to Data Connections\DefaultConnection\Tables\AspNetUsers, right-click and select Open table definition.
The following image shows the
AspNetUsersschema:
-
Right-click on the AspNetUsers table and select Show Table Data.

At this indicate the email has not been confirmed.
The default data store for ASP.NET Identity is Entity Framework, but yous can configure information technology to use other data stores and to add additional fields. See Additional Resources section at the end of this tutorial.
The OWIN startup class ( Startup.cs ) is chosen when the app starts and invokes the ConfigureAuth method in App_Start\Startup.Auth.cs, which configures the OWIN pipeline and initializes ASP.NET Identity. Examine the ConfigureAuth method. Each CreatePerOwinContext phone call registers a callback (saved in the OwinContext) that will be chosen in one case per request to create an instance of the specified blazon. You can set a break point in the constructor and Create method of each blazon (ApplicationDbContext, ApplicationUserManager) and verify they are chosen on each asking. A instance of ApplicationDbContext and ApplicationUserManager is stored in the OWIN context, which can exist accessed throughout the awarding. ASP.Net Identity hooks into the OWIN pipeline through cookie middleware. For more information, see Per request lifetime management for UserManager class in ASP.Cyberspace Identity.
When you lot change your security profile, a new security stamp is generated and stored in the SecurityStamp field of the AspNetUsers table. Note, the SecurityStamp field is dissimilar from the security cookie. The security cookie is not stored in the AspNetUsers tabular array (or anywhere else in the Identity DB). The security cookie token is self-signed using DPAPI and is created with the UserId, SecurityStamp and expiration fourth dimension data.
The cookie middleware checks the cookie on each request. The SecurityStampValidator method in the Startup class hits the DB and checks security stamp periodically, every bit specified with the validateInterval. This simply happens every 30 minutes (in our sample) unless you change your security contour. The 30 minute interval was called to minimize trips to the database. Come across my two-factor authentication tutorial for more details.
Per the comments in the code, the UseCookieAuthentication method supports cookie authentication. The SecurityStamp field and associated code provides an extra layer of security to your app, when y'all change your countersign, you will be logged out of the browser you logged in with. The SecurityStampValidator.OnValidateIdentity method enables the app to validate the security token when the user logs in, which is used when you lot change a countersign or utilize the external login. This is needed to ensure that any tokens (cookies) generated with the quondam countersign are invalidated. In the sample projection, if you change the users password so a new token is generated for the user, any previous tokens are invalidated and the SecurityStamp field is updated.
The Identity system allow y'all to configure your app so when the users security profile changes (for example, when the user changes their password or changes associated login (such as from Facebook, Google, Microsoft business relationship, etc.), the user is logged out of all browser instances. For example, the epitome below shows the Single signout sample app, which allows the user to sign out of all browser instances (in this instance, IE, Firefox and Chrome) by selecting one button. Alternatively, the sample allows you lot to only log out of a specific browser instance.

The Single signout sample app shows how ASP.NET Identity allows you to regenerate the security token. This is needed to ensure that any tokens (cookies) generated with the old password are invalidated. This feature provides an extra layer of security to your application; when yous change your password, you will be logged out where you have logged into this application.
The App_Start\IdentityConfig.cs file contains the ApplicationUserManager, EmailService and SmsService classes. The EmailService and SmsService classes each implement the IIdentityMessageService interface, so you have common methods in each grade to configure email and SMS. Although this tutorial just shows how to add together email notification through SendGrid, you can send email using SMTP and other mechanisms.
The Startup form also contains boiler plate to add together social logins (Facebook, Twitter, etc.), see my tutorial MVC 5 App with Facebook, Twitter, LinkedIn and Google OAuth2 Sign-on for more than info.
Examine the ApplicationUserManager class, which contains the users identity information and configures the following features:
- Password force requirements.
- User lock out (attempts and fourth dimension).
- 2-cistron authentication (2FA). I'll cover 2FA and SMS in another tutorial.
- Hooking up the e-mail and SMS services. (I'll cover SMS in some other tutorial).
The ApplicationUserManager course derives from the generic UserManager<ApplicationUser> class. ApplicationUser derives from IdentityUser. IdentityUser derives from the generic IdentityUser form:
// Default EntityFramework IUser implementation public form IdentityUser<TKey, TLogin, TRole, TClaim> : IUser<TKey> where TLogin : IdentityUserLogin<TKey> where TRole : IdentityUserRole<TKey> where TClaim : IdentityUserClaim<TKey> { public IdentityUser() { Claims = new List<TClaim>(); Roles = new List<TRole>(); Logins = new List<TLogin>(); } /// User ID (Primary Key) public virtual TKey Id { get; ready; } public virtual string Email { get; set; } public virtual bool EmailConfirmed { get; set up; } public virtual string PasswordHash { become; set; } /// A random value that should alter whenever a users credentials have changed (password inverse, login removed) public virtual string SecurityStamp { go; set; } public virtual string PhoneNumber { get; gear up; } public virtual bool PhoneNumberConfirmed { go; set; } public virtual bool TwoFactorEnabled { get; set; } /// DateTime in UTC when lockout ends, whatever fourth dimension in the by is considered not locked out. public virtual DateTime? LockoutEndDateUtc { become; set; } public virtual bool LockoutEnabled { get; fix; } /// Used to record failures for the purposes of lockout public virtual int AccessFailedCount { go; set; } /// Navigation belongings for user roles public virtual ICollection<TRole> Roles { get; individual set; } /// Navigation holding for user claims public virtual ICollection<TClaim> Claims { get; individual set; } /// Navigation property for user logins public virtual ICollection<TLogin> Logins { go; individual gear up; } public virtual string UserName { get; fix; } } The properties above coincide with the properties in the AspNetUsers tabular array, shown to a higher place.
Generic arguments on IUser enable you to derive a form using different types for the primary cardinal. See the ChangePK sample which shows how to change the primary central from cord to int or GUID.
ApplicationUser
ApplicationUser (public class ApplicationUserManager : UserManager<ApplicationUser>) is defined in Models\IdentityModels.cs equally:
public class ApplicationUser : IdentityUser { public async Task<ClaimsIdentity> GenerateUserIdentityAsync( UserManager<ApplicationUser> manager) { // Note the authenticationType must match the 1 defined in // CookieAuthenticationOptions.AuthenticationType var userIdentity = await director.CreateIdentityAsync(this, DefaultAuthenticationTypes.ApplicationCookie); // Add custom user claims here return userIdentity; } } The highlighted code to a higher place generates a ClaimsIdentity. ASP.NET Identity and OWIN Cookie Authentication are claims-based, therefore the framework requires the app to generate a ClaimsIdentity for the user. ClaimsIdentity has data most all the claims for the user, such equally the user'due south proper name, historic period and what roles the user belongs to. Yous can also add more claims for the user at this phase.
The OWIN AuthenticationManager.SignIn method passes in the ClaimsIdentity and signs in the user:
private async Job SignInAsync(ApplicationUser user, bool isPersistent) { AuthenticationManager.SignOut(DefaultAuthenticationTypes.ExternalCookie); AuthenticationManager.SignIn(new AuthenticationProperties(){ IsPersistent = isPersistent }, look user.GenerateUserIdentityAsync(UserManager)); } MVC v App with Facebook, Twitter, LinkedIn and Google OAuth2 Sign-on shows how you can add additional properties to the ApplicationUser class.
Electronic mail confirmation
It's a good thought to confirm the email a new user register with to verify they are not impersonating someone else (that is, they haven't registered with someone else's email). Suppose y'all had a discussion forum, yous would want to prevent "bob@example.com" from registering as "joe@contoso.com". Without email confirmation, "joe@contoso.com" could get unwanted email from your app. Suppose Bob accidentally registered equally "bib@example.com" and hadn't noticed it, he wouldn't be able to use countersign recover because the app doesn't have his correct email. Electronic mail confirmation provides only express protection from bots and doesn't provide protection from determined spammers, they have many working email aliases they can employ to register.In the sample beneath, the user won't be able to change their countersign until their account has been confirmed (by them selecting a confirmation link received on the email account they registered with.) Yous tin can apply this work flow to other scenarios, for example sending a link to confirm and reset the password on new accounts created past the administrator, sending the user an e-mail when they have changed their contour and so on. You by and large want to prevent new users from posting any data to your web site before they have been confirmed by electronic mail, a SMS text message or another mechanism.
Build a more complete sample
In this section, you lot'll employ NuGet to download a more complete sample we volition work with.
-
Create a new empty ASP.Internet Web project.
-
In the Parcel Manager Panel, enter the post-obit commands:
Install-Package SendGrid Install-Package -Prerelease Microsoft.AspNet.Identity.SamplesIn this tutorial, nosotros'll use SendGrid to send email. The
Identity.Samplespackage installs the code nosotros will exist working with. -
Set the project to use SSL.
-
Test local account cosmos by running the app, selecting the Register link, and posting the registration course.
-
Select the demo email link, which simulates e-mail confirmation.
-
Remove the demo email link confirmation code from the sample (The
ViewBag.Linkcode in the account controller. Meet theDisplayEmailandForgotPasswordConfirmationaction methods and razor views ).
Warning
If you change whatever of the security settings in this sample, productions apps volition demand to undergo a security inspect that explicitly calls the changes fabricated.
Examine the code in App_Start\IdentityConfig.cs
The sample shows how to create an account and add it to the Admin function. You should replace the email in the sample with the electronic mail you volition be using for the admin account. The easiest manner correct at present to create an administrator account is programmatically in the Seed method. Nosotros hope to have a tool in the time to come that will allow you lot to create and administer users and roles. The sample lawmaking does let yous create and manage users and roles, merely you lot must start take an administrators account to run the roles and user admin pages. In this sample, the admin account is created when the DB is seeded.
Alter the password and modify the name to an account where yous tin can receive email notifications.
Warning
Security - Never store sensitive data in your source lawmaking.
As mentioned previously, the app.CreatePerOwinContext call in the startup class adds callbacks to the Create method of the app DB content, user manager and role manger classes. The OWIN pipeline calls the Create method on these classes for each request and stores the context for each class. The account controller exposes the user manager from the HTTP context (which contains the OWIN context):
public ApplicationUserManager UserManager { get { return _userManager ?? HttpContext.GetOwinContext().GetUserManager<ApplicationUserManager>(); } private set { _userManager = value; } } When a user registers a local business relationship, the HTTP Post Register method is called:
[HttpPost] [AllowAnonymous] [ValidateAntiForgeryToken] public async Chore<ActionResult> Register(RegisterViewModel model) { if (ModelState.IsValid) { var user = new ApplicationUser { UserName = model.Email, Email = model.E-mail }; var result = wait UserManager.CreateAsync(user, model.Password); if (result.Succeeded) { var code = expect UserManager.GenerateEmailConfirmationTokenAsync(user.Id); var callbackUrl = Url.Action( "ConfirmEmail", "Account", new { userId = user.Id, code = code }, protocol: Request.Url.Scheme); wait UserManager.SendEmailAsync(user.Id, "Confirm your account", "Please confirm your business relationship by clicking this link: <a href=\"" + callbackUrl + "\">link</a>"); // ViewBag.Link = callbackUrl; // Used but for initial demo. return View("DisplayEmail"); } AddErrors(effect); } // If we got this far, something failed, redisplay class render View(model); } The lawmaking above uses the model information to create a new user account using the email and password entered. If the email allonym is in the data shop, account creation fails and the form is displayed again. The GenerateEmailConfirmationTokenAsync method creates a secure confirmation token and stores information technology in the ASP.Cyberspace Identity data store. The Url.Action method creates a link containing the UserId and confirmation token. This link is then emailed to the user, the user tin can select on the link in their email app to confirm their account.
Set upwardly email confirmation
Get to the SendGrid sign up page and register for gratuitous account. Add code similar to the following to configure SendGrid:
public class EmailService : IIdentityMessageService { public Task SendAsync(IdentityMessage message) { render configSendGridasync(message); } private Task configSendGridasync(IdentityMessage bulletin) { var myMessage = new SendGridMessage(); myMessage.AddTo(bulletin.Destination); myMessage.From = new System.Internet.Mail.MailAddress( "Joe@contoso.com", "Joe Due south."); myMessage.Subject area = bulletin.Subject; myMessage.Text = message.Torso; myMessage.Html = bulletin.Trunk; var credentials = new NetworkCredential( ConfigurationManager.AppSettings["mailAccount"], ConfigurationManager.AppSettings["mailPassword"] ); // Create a Web ship for sending email. var transportWeb = new Web(credentials); // Transport the email. if (transportWeb != zero) { render transportWeb.DeliverAsync(myMessage); } else { return Task.FromResult(0); } } } Note
Email clients oftentimes accept but text messages (no HTML). You should provide the bulletin in text and HTML. In the SendGrid sample above, this is done with the myMessage.Text and myMessage.Html code shown above.
The post-obit lawmaking shows how to send electronic mail using the MailMessage course where bulletin.Trunk returns only the link.
void sendMail(Message message) { #region formatter string text = string.Format("Delight click on this link to {0}: {one}", message.Subject, message.Body); cord html = "Please confirm your account by clicking this link: <a href=\"" + message.Body + "\">link</a><br/>"; html += HttpUtility.HtmlEncode(@"Or click on the copy the following link on the browser:" + message.Body);
0 Response to "Can Identityconfig.cs Be Updated Without Push"
Post a Comment